
Submission Guide 2.0
Welcome to the Story Submission Guide 2.0
Hello SWManiacs,
it has been a while since the last version of this guide and many more versions of the back end of our beloved site.
Since things seem to be a bit quieter right now and the stream of stories is really steady, we (read the admin team) decided to rework the guide with the current version of the software (while praying the internet goddesses that nothing changes too much in the near future).
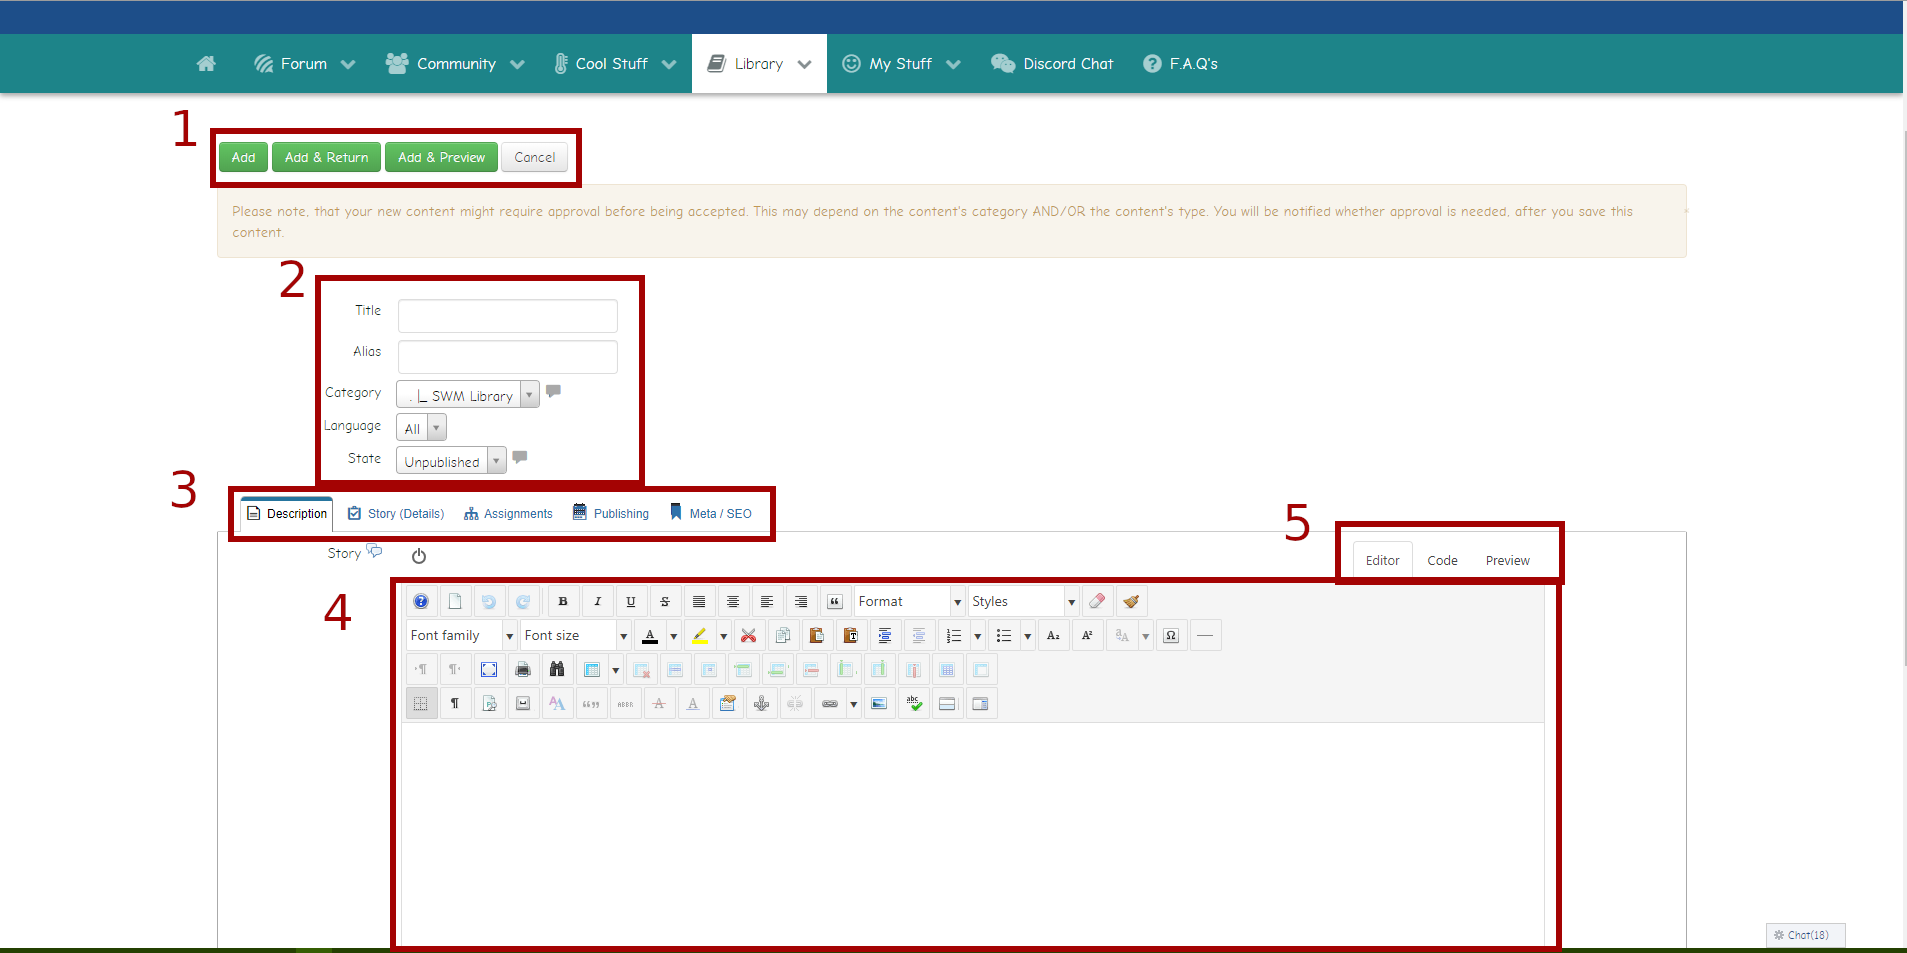
For ease of use the guide will be divided in parts based on the sections outlined in the picture below.
Prologue
To get to the editor above you simply have to mouse over the Library tab at the top of the front page, then select Submit a Story.
Attention: If you're not a registered user of our site the story will be uploaded anonymously and the Librarian (a.k.a. yours truly) will reject it 99% of the times.
*****
1. Upper Buttons
The four upper buttons at the top of the page are the easiest to explain, but also the ones that are used the less. They simply allow to save or abandon a story.
- Add is the equivalent of Save in a normal text editor, it allows to save the story and keep working on it immediately.
- Add & Return save the story and send you out of the editor
- Add & Preview save the story and provide an immediate view of its current status in the front end of the site. Usually, this is required only for stories with very complex formatting.
- Cancel simply drops everything, keeping any previous change saved via Add.
After a story is added to the site, via one of the first three buttons, the author can change it further. In this case the buttons will feature the word "Save" instead of "Add", but they work exactly the same.
Attention: any change must be approved by an admin after being submitted.
*****
2. Title & Friends
This is the first section that requires compilation. Out of the five fields available, the only ones that concern an author are Title and Language (optional).
- Title is just the title of the story, which will appear on the front page. While the field can take a lot of characters, using names that are too long might be a disadvantage, since the front page module might truncate them.
- Language is an optional field since the only possible choices are "All" and "English (UK)". You can go with either no problem.
Librarian Note
For those who are writing a series, please be coherent in adding titles to your stories.
If the first chapter was labeled "Ubergirl Flight, Part 1", keep that same style for the others. Do not switch to "Ubergirl Flight 2" or "Ubergirl Flight -- Chapter Two".
It's not a big deal, but it helps my work immensely.
What about the other three voices?
- Contrary to what you might think, Alias is not the name of the author. It's a unique ID assigned by the software to each story to create links and incorporate it into the database. DO NOT WRITE ANYTHING HERE.
- Category indicates the main place where your story will appear. Since only the stories uploaded to SWM Library appears on the front page, please don't touch this one.
- Status indicates if a story is published, unpublished, trashed or what. Unpublished stories are visible only to their author and the admins. Only the admins can change the publication status, so leave this thing alone.
*****
3. Tabs
The tabs allow to navigate the different parts of the story editor.
As far as a writer is concerned the important ones are Description (the first) and Assignment (the third). In the above picture, the editor is set in the Description tab (more on it later).
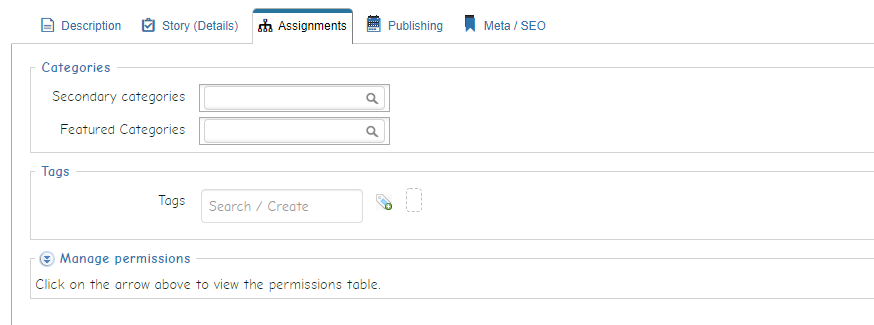
In the Assignment tab the important part is the Tags section, which allows an author to browse through the list of tags avaible and add them to the story, making easier to browse through the Library.
Librarian Note
Although it's possible to create new tags, I urge the authors to consult me before doing so.
In the past, we had some authors adding weirdly specific tags and cluttering the back end. I have to desire to go through the list a delete them manually once more.
*****
4. The Editor
This is the easy part of the system. The main editor works in the same way as a normal MS Word-like software.
It's possible to paste the story directly from a text file, but there are a number of things you should consider that the internal editor has a limited selection of fonts, making the use of very specific one complex or downright impossible.
Also, please triple-check that each paragraph of your story is separated and not a "soft return".
This is a "full
return"
This is a "soft
return"
*****
5. Editor Tabs
As a general rule, the three editor tabs are used only to fine-tune the format of a story.
Unless you're proficient with HTML 5, do not touch them!!!
*****
A Final Note: Formatting
In the last couple of years, I started formatting all the stories in a similar way: justified text, with a 0.5cm first-line indent in each paragraph. I decided on this format because it makes the text clearer and more professional-looking.
While it's entirely possible to justify the text in the editor, adding the indent requires working on the HTML version, so leave it to me.